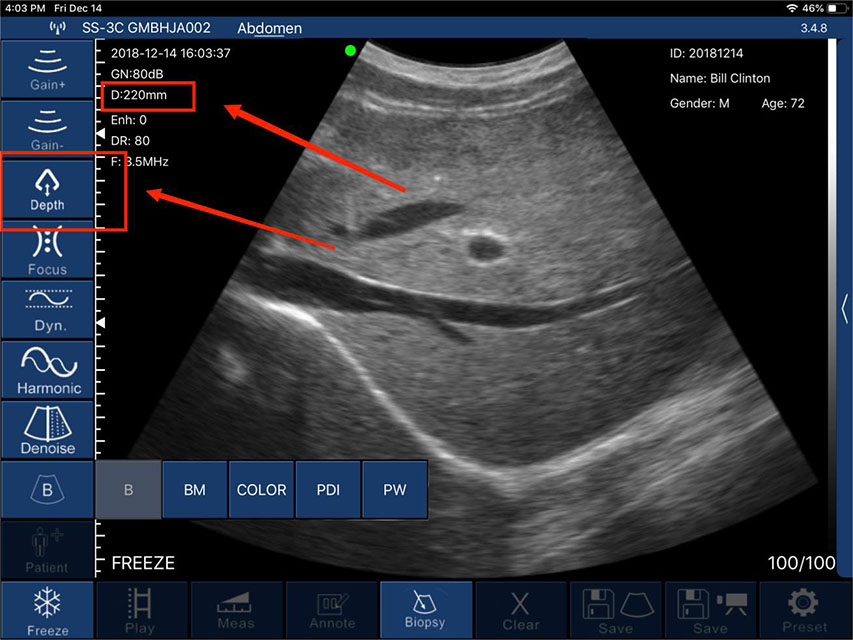
Depth (D):
Adjusting the scan depth penetration is controlled in the parameters as "Depth". Tapping increases or decreases it, and you can also modify the image depth by sliding the screen of your smartphone/tablet up or down.
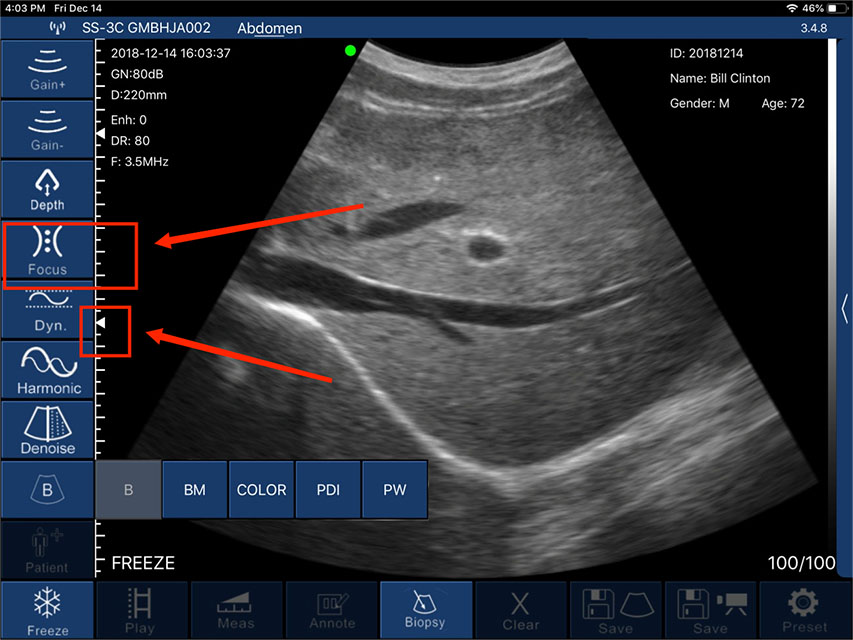
Focus:
The focus control is displayed as the "Focus" icon in the parameters. Tapping allows selection between 0 to 3. Contrast and resolution of the image at the focus point will increase, providing a clearer view.
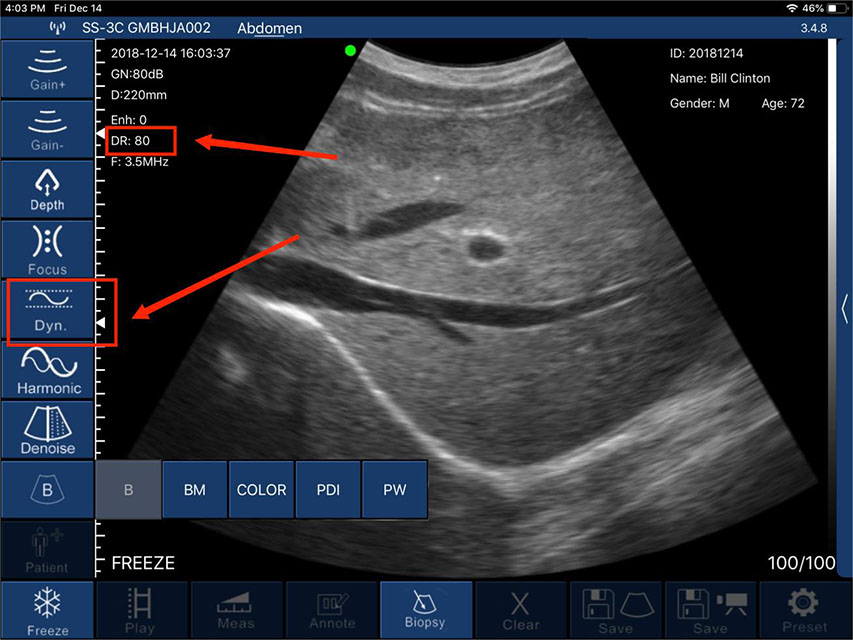
Dynamic Range:
The dynamic range control is represented by the "Dyn" icon in the parameters. Tapping allows adjustment between 40 to 110 to modify the image's dynamic range.
Note: Increasing the dynamic range will display more layers and information in the image, simultaneously introducing more noise.
Harmonic:
The frequency control is represented by the "Harmonic" icon in the parameters. Tapping allows for changing the probe's operating frequency.
Note: Typically, the frequency is automatically selected based on specific presets.

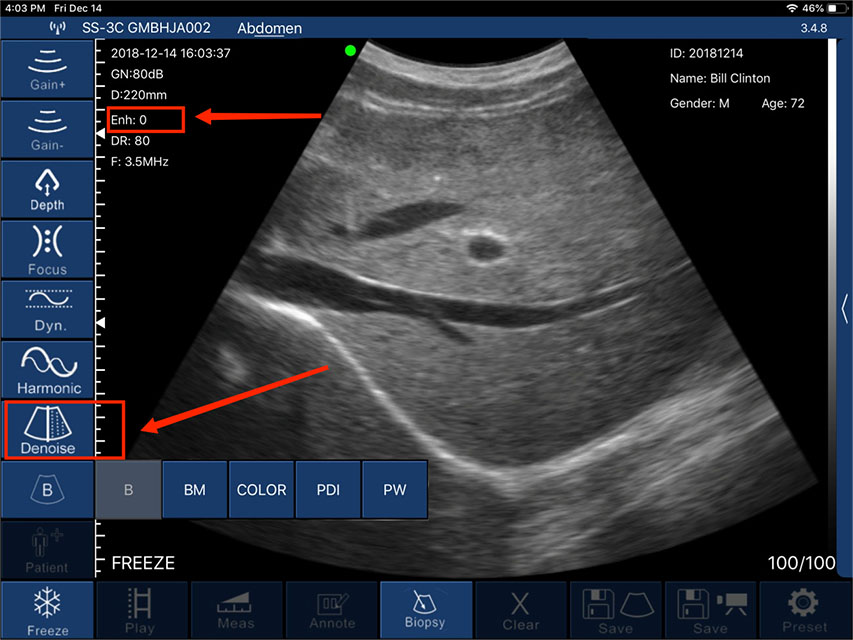
Denoise:
The denoising control is displayed as the "Denoise" icon in the parameters. Tapping allows selection from 0 to 4. 0 represents no denoising. We typically recommend setting it to 2 or 3.
Note: Denoising refers to reducing imaging noise. It will enhance clarity while reducing frame rate.
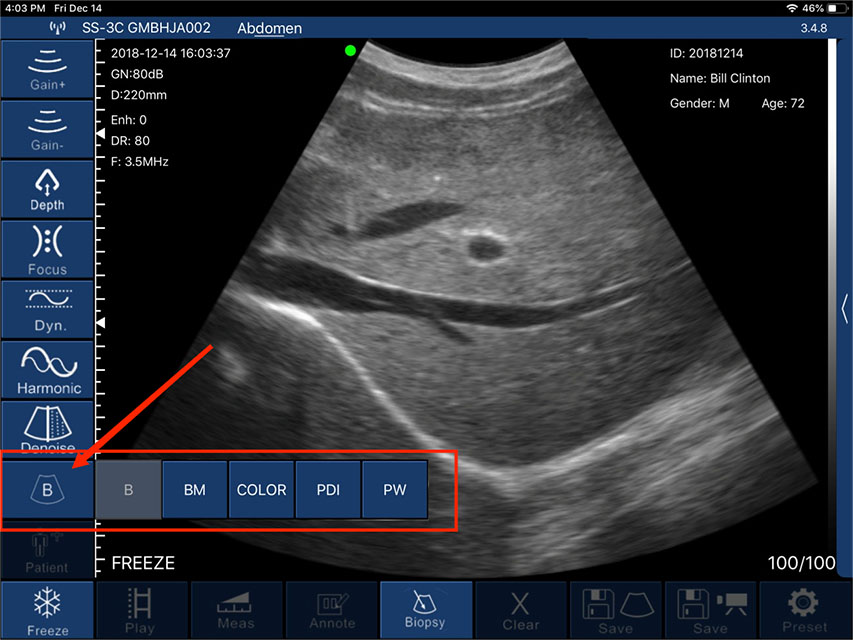
Modes:
Mode control is displayed as the "B" icon in the parameters. Tap the "B" icon to expand different Doppler options, including B, B/M, Color Doppler, Pulsed Wave Doppler, and Power Doppler. Tap to select the desired mode.
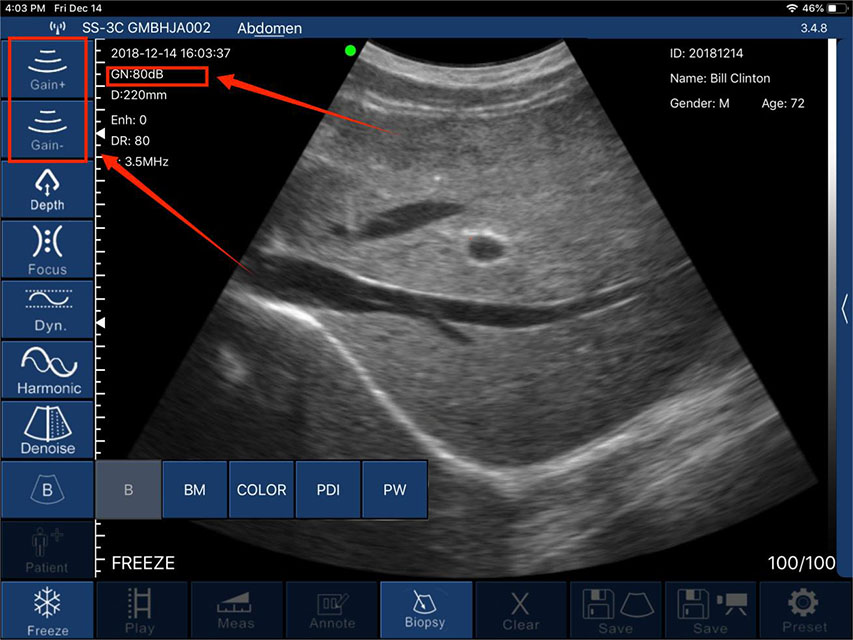
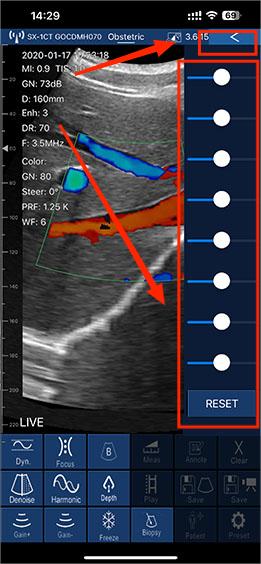
Time Gain Compensation (TGC):
The TGC control is positioned on the right side of the interface (for tablets) or at the top right corner (for smartphones). Tap the arrow icon to expand the bar graph and then slide to make adjustments.
Note: TGC normalizes signal amplitude over time; compensates for depth.
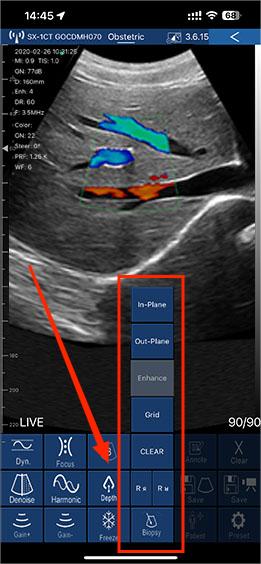
Biopsy :
Biopsy functionality refers to drawing a puncture line for needle guidance. Tap the "Biopsy" icon to expand options such as in-plane injection and out-of-plane injection.